
To move from Vendor Central to Seller Central (1P to 3P), open and verify a Seller Central account, connect it to your brand in Brand Registry, add your own offers to your existing ASINs instead of creating new listings, and time your first FBA shipments to land as Amazon's remaining 1P stock runs out. Then rebuild advertising in the seller account, because vendor campaigns do not transfer, and take over pricing, customer service and account health. Done well, it takes about 90 days, and most brands keep their reviews, rank and sales. Done in a rush, the usual result is a stockout, a price war with Amazon's leftover inventory, and several weeks of lost rank.
Key takeaways
- Your listings, reviews and ASINs stay. You are changing who sells them, not the product pages.
- Export your data from Vendor Central before access ends: sales history, catalog, A+ Content, ad bulk files and deduction records.
- Amazon keeps selling the 1P units it already owns until they run out. Plan your FBA arrival around that run-down.
- Vendor ad campaigns do not move across. Rebuild them in the seller account, starting with branded and top-converting terms.
- On 3P you fund inventory up front and get paid on a rolling cycle, so model cash flow before your first big shipment.
Why brands are moving from Vendor Central to Seller Central
There are two kinds of migrations, and they need different speeds.
- Amazon ended the relationship. Amazon stopped buying from thousands of smaller vendors in 2019, then sent termination notices to many vendors in November 2024, most of them reportedly under $5 to $10 million a year in vendor sales. Consultancies report further rounds since then. Once purchase orders stop, the clock is set by how fast Amazon's remaining stock sells out.
- You chose to leave. Brands also move because co-op, chargebacks and price matching have eaten the margin, or because they want control of price and data. Here you set the timeline, and you can run both accounts in parallel while you switch.
Either way, the work is the same. If you are still weighing the two models, start with our Amazon 1P vs 3P comparison, including the $100K-a-month margin example. This playbook is for brands that have decided, or had it decided for them.
Before you start: save everything from Vendor Central
Vendor Central access does not last forever after a relationship ends, and none of your history moves to Seller Central on its own. In the first week, export:
- Sales and traffic history by ASIN. At least 12 months, weekly if you can. This is your demand forecast for FBA.
- Purchase order history. Order sizes and timing show how much stock Amazon likely still holds.
- Catalog data. Titles, bullets, descriptions, backend search terms, images, A+ Content and variation families.
- Advertising. Bulk files of every campaign, plus search term reports, so you can rebuild what worked.
- Deductions and disputes. Open chargebacks, shortage claims and co-op invoices. Settle or dispute them while you still can.
- Cost and price history. Your cost price to Amazon and Amazon's retail price by ASIN, to set your own pricing.
Also ask your vendor contact two questions in writing: what happens to the inventory Amazon still holds, and the exact date your vendor access and purchase orders end.
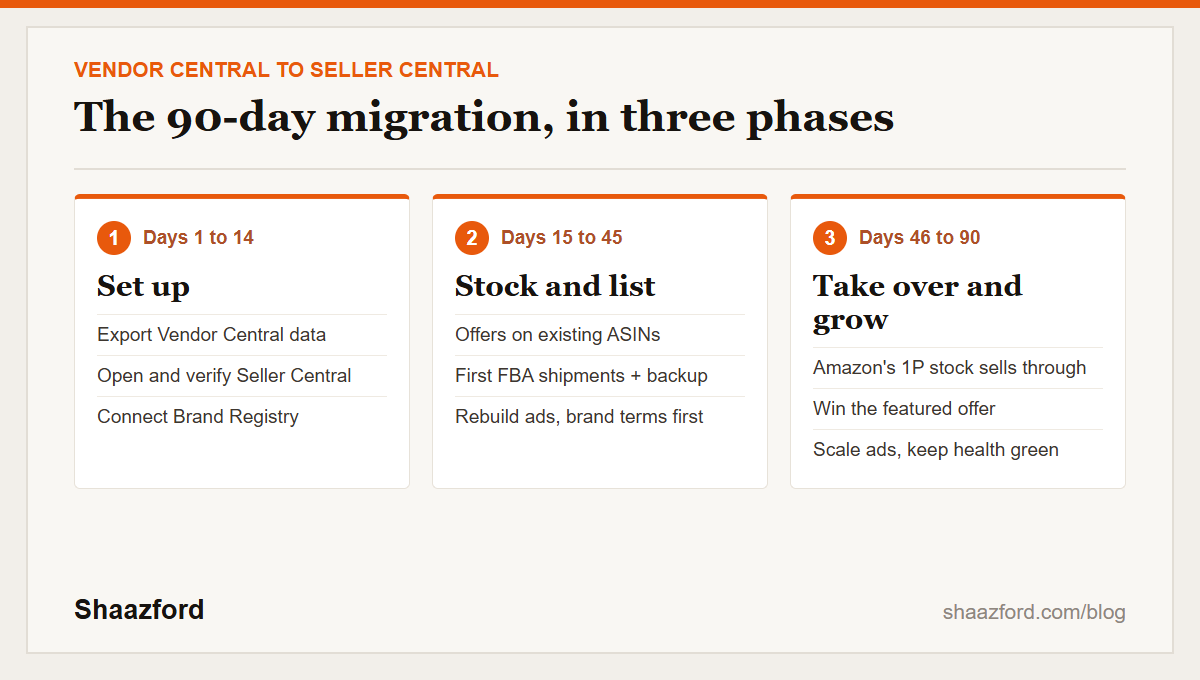
The 90-day migration plan
| Phase | Days | What gets done | Done when |
|---|---|---|---|
| 1. Set up | 1 to 14 | Data exported, Seller Central opened and verified, Brand Registry connected, pricing and cash plan drafted | You can create offers on your ASINs and edit their content |
| 2. Stock and list | 15 to 45 | Offers created on existing ASINs, first FBA shipments sent, backup fulfillment ready, ads rebuilt | Your offer is live with stock on every priority ASIN |
| 3. Take over and grow | 46 to 90 | Amazon's 1P stock sold through, your offer holds the featured offer, ads scaled, account health stable | Sales back at or above the 1P run rate, at a better margin |
If Amazon has already stopped ordering, compress phase 1 into days, not weeks. The one step you cannot rush is identity verification, so start it on day one.
Step 1: Open and verify your Seller Central account
Register for the Professional selling plan ($39.99 a month) under the legal entity that owns the brand. Amazon verifies the business, the bank account and the person registering, and may ask for a live video call. Verification can take anywhere from days to several weeks, which is why it comes first.
If your company already has a Seller Central account, use it. Amazon expects one selling account per business unless there is a legitimate business need for more, and a second account opened to "start fresh" can put both at risk of suspension.
Step 2: Connect your brand in Brand Registry
Brand Registry is what gives you control of your listings as a third-party seller: content edits, A+ Content, Brand Stores, Sponsored Brands, Brand Analytics and the tools to remove hijackers. Many vendors enrolled their brand while on Vendor Central. Depending on how it was set up, you either connect the new selling account to the existing enrollment or enroll again with your trademark. Brand Registry support will tell you which, and it is worth sorting out before you touch any listing. Our Brand Registry setup guide covers the enrollment itself.
Step 3: Add your offers to your existing listings
Your ASINs already exist, with their reviews and sales history. Do not create new listings. Create offers on the existing ASINs by matching each product's UPC or GTIN, so your SKU attaches to the same page. Duplicate listings split reviews and rank, and Amazon removes them.
Then check the content. Amazon's retail team and other contributors may have edited titles, bullets or images while you were a vendor. With Brand Registry in place, restore the strongest version of each listing, check variation families are intact, and confirm the backend search terms from your export are back. Our listing optimization guide covers what to fix first, and backend keywords are explained here.
Step 4: Plan the inventory handover
This is where most migrations go wrong. Amazon keeps selling the 1P units it already owns until they run out, and while it has stock, its own offer usually holds the featured offer. Two failure modes follow.
- You arrive too late: Amazon sells out, your stock is not checked in, and the listing goes out of stock. Rank drops within days.
- You arrive too early: your units sit in FBA earning storage fees while Amazon's offer outsells yours, and you are tempted to cut price to compete.
Estimate how much stock Amazon holds from your recent purchase orders minus its recent sell-through, then aim for your FBA inventory to be checked in a week or two before Amazon's runs out. Remember that new seller accounts have little sales history, and FBA capacity limits are set from forecast sales and your Inventory Performance Index, so your first months may come with tight limits. Have a bridge ready: merchant fulfillment from your own warehouse or a 3PL (FBA vs FBM explains the trade-off), or Seller Fulfilled Prime if your operation qualifies.
Timing matters too. Avoid landing a migration on Prime Day or the fourth quarter if you can. Capacity is tightest, competition is highest, and a stockout costs the most. If you are switching in October, plan for constrained FBA capacity through the holidays and lean on your bridge fulfillment.
Step 5: Take control of pricing
For the first time on Amazon, you set the price. Start from the retail price Amazon was charging, check it against your other channels and any minimum advertised price policy, and set a floor that protects margin after referral and FBA fees.
During the run-down, Amazon's leftover units may be priced below yours. Do not chase it to the bottom. It is temporary, and a price war with your own old stock teaches shoppers and algorithms a lower price. Once Amazon's stock clears, your offer becomes the featured offer at your price. If you use repricing tools, set them so they never undercut your floor; our guide to automated pricing on Amazon covers the settings.
Step 6: Rebuild your advertising
Campaigns in the vendor advertising console do not transfer to a seller account. Use the bulk files you exported: change the advertised ASINs to your new SKUs, upload them to the seller account, and relaunch. Expect a learning period while the new campaigns build history.
- Protect your brand first. Launch branded keyword and product-targeting campaigns on day one so competitors cannot take your branded searches during the switch.
- Relaunch proven winners next. Use your exported search term reports to restart the keywords that converted on the vendor side.
- Hold back on broad discovery until your stock is checked in. Advertising an offer that cannot ship wastes the budget.
- Re-add Sponsored Brands and video once Brand Registry is connected, and restart Amazon DSP if you used it.
This is where an experienced Amazon PPC team pays for itself: rebuilding a mature ad account quickly, without paying for a second learning curve.
Step 7: Own the operations Amazon used to handle
As a vendor, Amazon owned the customer. As a seller, you do. That means answering buyer messages within 24 hours, handling returns and claims, and keeping account health inside Amazon's targets:
| Metric | Amazon target | Applies to |
|---|---|---|
| Order defect rate | Under 1% | All orders |
| Late shipment rate | Under 4% | Orders you ship yourself |
| Pre-fulfillment cancel rate | Under 2.5% | Orders you ship yourself |
| Valid tracking rate | Over 95% | Orders you ship yourself |
FBA covers most of the shipping metrics for units Amazon fulfills, but policy compliance, product authenticity complaints and listing issues are all yours. Set up a daily account health check from week one. It is far easier to keep a clean record than to repair one.
Step 8: Plan the cash flow
This catches finance teams off guard. As a vendor, Amazon bought your inventory and paid you 60 to 90 days later. As a seller, you fund the inventory, pay to ship it into FBA, and pay referral and fulfillment fees out of each sale. Payouts arrive on a rolling cycle of about 14 days, and since March 2026 Amazon holds funds until 7 days after delivery, the DD+7 change.
The upside is that you keep the retail margin instead of the wholesale margin. The catch is a gap at the start: you are paying for your first FBA shipments while your last vendor invoices are still being paid. Model eight to twelve weeks of inventory and fees before the first big shipment. If the gap is too wide, look at inventory financing, including Amazon Lending once you are eligible.
Seven mistakes that cost brands the most
- Creating new listings instead of offers on existing ASINs, splitting reviews and rank.
- Waiting for the last purchase order before opening Seller Central, then stalling on verification.
- Shipping to FBA with no capacity plan and no backup fulfillment.
- Racing Amazon's leftover stock on price and resetting your price point for good.
- Leaving branded search undefended while ads are rebuilt.
- Forgetting the deductions. Open chargebacks and shortage claims have dispute windows. Miss them and the money is gone.
- Underfunding inventory because the vendor payment terms disguised how much working capital the business really needs.
What a good migration looks like at day 90
- Every priority ASIN is in stock under your offer, holding the featured offer.
- Weekly sales are at or above the old 1P run rate, at a higher margin per unit.
- Branded search is defended and the rebuilt ad account is profitable on proven terms.
- Account health is green, with no listing or policy issues open.
- Your inventory plan covers the next quarter, including peak season, within your FBA capacity.
- All vendor deductions are settled or disputed.
Should you keep some products on Vendor Central?
If Amazon has not ended your vendor relationship, you do not have to move everything at once. A hybrid can work: keep high-volume, easy-to-ship products on 1P where the wholesale margin after deductions still makes sense, and move launches, bundles and higher-margin products to 3P. The rule is one owner per ASIN, written down, and reviewed against net margin each quarter. The hybrid section of our 1P vs 3P guide covers the rules.
How Shaazford runs a vendor to seller migration
We run Vendor Central and Seller Central accounts for brands doing $100K or more a month, so we work both sides of the switch at once: the data export and deduction clean-up on the vendor side, and verification, Brand Registry, offers, FBA planning, pricing, ads and account health on the seller side. We plan the inventory handover around Amazon's run-down so your listings stay in stock.
Pricing is flat: $1,600 a month for full account management, with no percentage of ad spend, no contract and no migration surcharge. We take your business as if it were our own, which during a migration means watching the stock and the featured offer every day. If Amazon has just ended your vendor relationship, book the audit and we will map your migration in the first call.